Sterility Testing of Pharmaceutical Products — Standard Operating Procedure
1. Purpose
This SOP covers the sterility testing procedure applicable to sterile in-process and finished pharmaceutical products, using two recognised pharmacopoeial methods — the membrane filtration method and the direct inoculation method.
2. Scope
The procedure described here applies to sterility testing of in-process materials and finished products manufactured under sterile conditions. Both membrane filtration and direct inoculation techniques are addressed, as the choice of method depends on the nature of the product being tested.
3. Procedure
3.1. Materials and Equipment Required
The following items must be available and verified as sterile before the test begins:
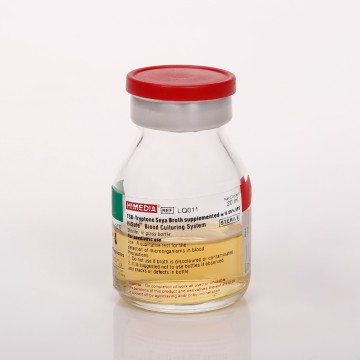
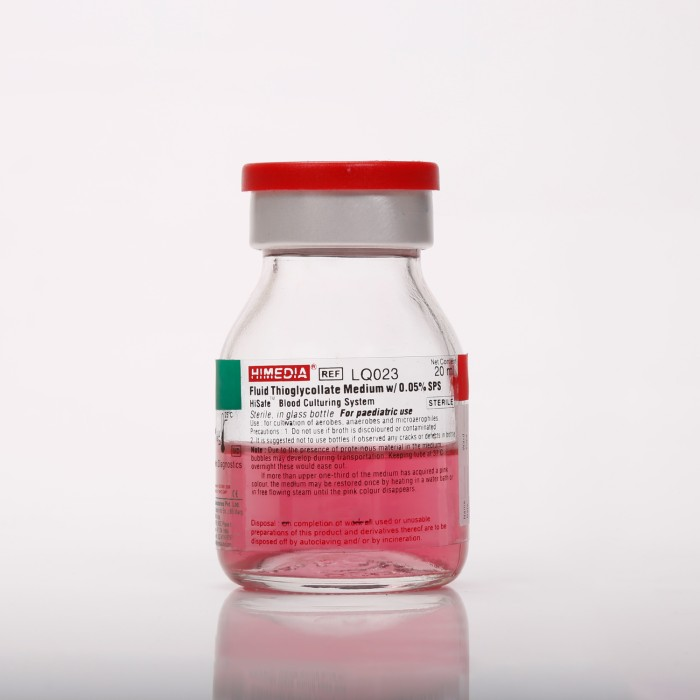
3.1.1. Fluid Thioglycollate Medium (FTM) 3.1.2. Soybean Casein Digest Medium (SCDM) 3.1.3. Test samples 3.1.4. Sterile disposable syringes 3.1.5. Sterile disposable needles 3.1.6. Sterile membrane filtration assembly 3.1.7. Sterile membrane filters (0.45 µm) 3.1.8. Sterile forceps 3.1.9. 70% Isopropyl Alcohol — sterile filtered 3.1.10. Biosafety Cabinet (BSC) or Laminar Air Flow (LAF) unit 3.1.11. Incubation facility maintained at 30°C to 35°C 3.1.12. Incubation facility maintained at 20°C to 25°C 3.1.13. Sterile garments 3.1.14. Sterile gloves 3.1.15. Fluid A — 1% Balanced Peptone solution (prepared by dissolving 1 g of balanced peptone in 100 mL of purified water) 3.1.16. Reference cultures: Pseudomonas aeruginosa, Staphylococcus aureus, Bacillus subtilis, Candida albicans, Aspergillus brasiliensis, Clostridium sporogenes
3.2. Testing Method
3.2.1. Growth Promotion Testing of Media
Before any batch of media is used for sterility testing, it must be subjected to a growth promotion test. This confirms that the medium is capable of supporting visible microbial growth under the specified incubation conditions. Any media batch that fails this test must be discarded and must not be used for sterility testing.
3.2.2. Number of Containers to be Sampled
Sampling must be carried out according to the following table, based on the total number of containers in the batch:
| Batch size (number of containers) | Minimum number of containers to sample |
|---|---|
| Not more than 100 | 10% of the batch or 4 containers, whichever is greater |
| More than 100 but not more than 500 | 10 containers |
| More than 500 | 2% of the batch or 20 containers, whichever is less |
3.2.3. Reference Organisms Used as Controls
The following organisms are used as positive controls to validate the test:
| Culture Medium | Organism | ATCC No. | Incubation Temp. (°C) | Incubation Period (Days) | Organism Type |
|---|---|---|---|---|---|
| FTM | Clostridium sporogenes | 11437 | 30–35 | 3 | Anaerobic |
| FTM | Staphylococcus aureus | 6538 | 30–35 | 3 | Aerobic |
| FTM | Pseudomonas aeruginosa | 9027 | 30–35 | 3 | Aerobic |
| SCDM | Aspergillus brasiliensis | 16404 | 20–25 | 5 | Aerobic (fungal) |
| SCDM | Candida albicans | 10231 | 20–25 | 5 | Aerobic (yeast) |
| SCDM | Bacillus subtilis | 6633 | 20–25 | 5 | Aerobic |
3.2.4. Volume of Sample to be Used per Culture Medium (Injectable Products)
The quantity of product transferred into each culture medium vessel is determined by the fill volume per container, as shown below:
| Fill volume per container | Minimum volume for each culture medium |
|---|---|
| Less than 1 mL | Entire contents of the container |
| 1 mL to 40 mL | Half the contents, but not less than 1 mL |
| More than 40 mL and up to 100 mL | 20 mL |
| More than 100 mL | 10% of the container contents, but not less than 20 mL |
3.2.5. Membrane Filtration Method
Overview for those new to this technique: Membrane filtration works on a very simple physical principle — the product liquid is passed through a membrane with pores small enough (0.45 µm) to trap microorganisms while allowing the liquid to pass through freely. Any organisms present get caught on the membrane surface. That membrane is then placed directly into nutrient media, giving any trapped organisms the conditions they need to grow and become detectable. This method is especially well-suited for products that contain antimicrobial agents, because the rinsing steps carried out after filtration remove those inhibitory substances before incubation begins.
3.2.5.1. Preparing the work area
All steps of this procedure must be carried out inside a Biosafety Cabinet or LAF cabinet to maintain aseptic conditions throughout. Switch on the cabinet at least 15 to 30 minutes before beginning work, and wipe all interior surfaces with 70% sterile IPA. Personnel must wear sterile gown, gloves, mask, and cap. Every item introduced into the cabinet must be surface-disinfected with IPA prior to entry.
Maintaining the aseptic environment is not a formality — it is the foundation of a valid sterility test. Any lapse in technique here will compromise the result regardless of how carefully everything else is done.
3.2.5.2. Pre-wetting the membrane and loading the sample
Before loading the sample, aseptically wet the membrane with Fluid A. This pre-wetting conditions the membrane surface and promotes even, unobstructed liquid flow during filtration. Once the membrane is wetted, aseptically transfer the required volume of the test sample into the filter holder and apply vacuum to draw the liquid through the 0.45 µm membrane.
As the product passes through, microorganisms are retained on the membrane surface — they are simply too large to pass through the pores. The filtered liquid is discarded; the organisms of interest remain behind on the membrane.
3.2.5.3. Rinsing the membrane with Fluid A
After the product has been completely filtered, pass sterile Fluid A through the membrane. This rinse should be performed at least three times to ensure thorough removal of product residues.
This step is one that new analysts sometimes underestimate. Even after the bulk liquid has passed through, a thin layer of product remains on the membrane. If the product has any antimicrobial activity — from a preservative, an antibiotic, or a residual disinfectant — those residues will suppress microbial growth during incubation, producing a falsely negative result. Rinsing with Fluid A displaces these inhibitory substances without dislodging the trapped microorganisms, which are physically adhered to the membrane surface.
3.2.5.4. Cutting and transferring the membrane to culture media
Using sterile forceps, remove the membrane from the filter holder inside the cabinet. With sterile scissors, cut the membrane aseptically into two equal halves. Transfer one half into a vessel of FTM and the other half into a vessel of SCDM, using sterile forceps throughout.
The two media serve complementary roles. FTM supports the growth of bacteria including obligate anaerobes that cannot survive in oxygenated conditions. SCDM supports fungi, yeasts, and aerobic bacteria. Using both together ensures that the full spectrum of potential contaminants has an opportunity to be detected.

3.2.5.5. Incubation of FTM
Place the FTM vessels containing the membrane halves into an incubator maintained at 30°C to 35°C. Incubate for 14 days.
This temperature range is conducive to the growth of most pathogenic and environmental bacteria. The 14-day incubation period is a pharmacopoeial requirement, designed to allow sufficient time even for slow-growing organisms to produce detectable growth.

3.2.5.6. Incubation of SCDM
Place the SCDM vessels into a separate incubator maintained at 20°C to 25°C. Incubate for 14 days.
The lower temperature range is appropriate for fungi and yeasts, which generally have slower growth rates and grow optimally at temperatures below those favoured by most bacteria.
3.2.5.7. Daily observation and recording
Examine all incubating vessels every day for the full 14-day period. Signs of microbial growth to look for include:
- Turbidity — the medium becomes visibly cloudy or opaque
- Pellicle — a film or mat forming on the surface of the broth
- Sediment — a visible deposit accumulating at the bottom of the vessel
Record the result of each daily observation using the approved format:
- ✓ — no growth observed (satisfactory)
- ✗ — growth observed (unsatisfactory; report immediately)
A medium that remains clear throughout the observation period is what the test is looking for. Any unexpected change in appearance must be treated as a potential positive result and escalated without delay.
3.2.6. Direct Inoculation Method
3.2.6.1. Only media batches that have passed the growth promotion test may be used.
3.2.6.2. For in-process samples, use three vessels each of FTM and SCDM. For finished product testing, use 20 vessels.
3.2.6.3. Wipe all sample containers with 70% IPA and place them under the BSC before opening.
3.2.6.4. All transfers and manipulations must be performed inside the BSC.
Note: For oil-based vaccines, FTM and SCDM supplemented with 1% Polysorbate 80 must be used to ensure adequate dispersal of the product in the medium.
3.2.6.5. Using sterile disposable syringes, aseptically transfer the required quantity of sample (as per sections 3.2.2 and 3.2.4) into separate vessels of SCDM and FTM.
3.2.6.6. Incubate inoculated FTM vessels at 30°C to 35°C for 14 days.
3.2.6.7. Incubate inoculated SCDM vessels at 20°C to 25°C for 14 days.
3.2.6.8. For non-viscous liquid products, examine the primary culture vessels daily for any visible evidence of microbial growth throughout the 14-day period.
3.2.6.9. Record daily observations as ✓ (no growth) or ✗ (growth observed).
3.2.6.10. For live bacterial vaccines, growth is expected in both FTM and SCDM due to the presence of live organisms in the product. In these cases, prepare Gram-stained smears from the FTM and SCDM vessels at 48 hours and again at day 14 to confirm that only the expected vaccine organism is present and that no extraneous contamination has occurred.
3.2.6.11. All observations must be documented daily in the official record.
3.2.7. Sub-Culture Procedure
3.2.7.1. In situations where the test product itself renders the medium turbid — making it impossible to visually determine whether microbial growth is present — a sub-culture must be performed.
3.2.7.2. At the end of the 14-day incubation period, transfer a portion of the medium (not less than 1 mL) from each original vessel into a fresh vessel containing the same medium.
3.2.7.3. Incubate both the original vessels and the sub-culture vessels for a further period of not less than 4 days.
3.2.7.4. If no microbial growth is detected in either the original or sub-cultured vessels, the product passes the sterility test.
3.2.7.5. If microbial growth is detected in any vessel, the product fails the sterility test.
3.2.7.6. The test must not be repeated unless there is documented and unambiguous evidence that the test outcome was caused by a factor entirely unrelated to the product being tested.
3.2.8. Interpretation of Results
3.2.8.1. If no evidence of microbial growth is detected in any of the test vessels at the end of the observation period, the product under examination complies with the sterility test.
3.2.8.2. If microbial growth is detected, the product does not comply with the sterility test — unless it can be clearly and documentarily demonstrated that the result was due to a cause unrelated to the product itself.
3.2.8.3. A test may be declared invalid only when at least one of the following conditions is met:
- 3.2.8.3.1. Environmental monitoring data from the sterility testing area reveals a fault in the controlled conditions during the test period.
- 3.2.8.3.2. A documented review of the testing procedure identifies a procedural fault that occurred during the test.
3.2.8.4. Growth is detected in the negative control vessel, indicating environmental or procedural contamination.
3.2.8.5. Following microbiological identification of the isolated organism, the contamination can be conclusively attributed to a fault in the testing environment or technique rather than to the product itself.
3.2.8.6. When a test is formally declared invalid, it must be repeated using the same number of sample units as the original test.
3.2.8.7. If no growth is detected in the repeat test, the product complies with the sterility test.
3.2.8.8. If growth is again detected in the repeat test, the product does not comply with the sterility test.
3.2.8.9. For live bacterial vaccines, Gram-stained preparations from FTM and SCDM vessels must be examined at 48 hours and at day 14.
- 3.2.8.9.1. If organisms other than the expected vaccine seed culture are identified, the product does not comply with the sterility test, unless the test is demonstrated to be invalid on documented grounds.
- 3.2.8.9.2. If no organisms other than the expected vaccine seed culture are detected, the product complies with the sterility test.
3.2.9. Handling Positive Sterility Results
3.2.9.1. Immediate reporting and OOS initiation
Any positive sterility result must be reported to the section supervisor without delay and a formal Out of Specification (OOS) investigation must be initiated immediately. An OOS investigation is a structured, documented review that examines every possible cause of the unexpected result — from analyst technique and environmental conditions to media quality and equipment performance. No release decision may be made on the affected batch until the investigation is formally completed, reviewed by QA, and closed with a documented conclusion.
3.2.9.2. Organism identification and Root Cause Analysis
The organism recovered from the positive vessel must be identified to species level using Gram staining and appropriate biochemical or molecular characterisation methods. Species-level identification is the starting point for Root Cause Analysis (RCA) — the process of systematically tracing the contamination back to its source — since different organisms are characteristic of different contamination origins, such as skin flora pointing to a personnel breach, environmental spore-formers pointing to an air quality issue, or water-associated organisms pointing to an equipment or utility failure.
3.2.9.3. Scope of the investigation
The OOS investigation must cover every variable that could have contributed to the positive result. This includes:
- Personnel — gowning compliance, aseptic technique, training status, and qualification records of the analyst involved
- Environment — particulate monitoring data, settle plate and contact plate results, BSC or LAF certification status, and HVAC performance records for the test period
- Materials — sterility and expiry status of media, Fluid A, membrane filters, syringes, and all consumables used
- Media — confirmation that the batch of FTM and SCDM used had passed growth promotion testing prior to use
- Equipment — incubator temperature logs for the full 14-day observation period, filtration assembly integrity, and BSC airflow certification
- Controls — results of the positive and negative controls run alongside the test
3.2.9.4. CAPA — Corrective and Preventive Action
Once the root cause has been identified, a formal CAPA must be raised. A Corrective Action addresses the specific event — for example, re-training the analyst, replacing a faulty incubator, or quarantining a suspect media batch. A Preventive Action addresses the underlying system gap that allowed the problem to occur in the first place — for example, revising the SOP to include a mandatory glove integrity check, implementing automated incubator temperature alarms, or adding a media verification step as a documented pre-test requirement. Every CAPA must name a responsible person, carry a target completion date, and include a defined effectiveness check to confirm that the action taken has actually prevented recurrence.
3.2.9.5. Documentation
All findings, observations, investigation outcomes, identified root cause, and the complete CAPA plan must be formally recorded in the OOS report. This documentation is subject to regulatory inspection and must be thorough, factual, and evidence-based.
3.2.9.6. Contamination incident log
A dedicated log must be maintained to record every incident where extraneous contamination is suspected or confirmed during sterility testing. This log serves as a trend-monitoring tool — recurring contamination events involving the same organism, the same analyst, or the same area are a signal of a deeper systemic issue that requires escalated investigation even if each individual event appeared resolved at the time.
Acceptance Criteria: The product must comply with the test for sterility
No evidence of microbial growth shall be observed during the test period.
Recommended YouTube Videos on Sterility Testing
- Sterility Testing | A Best Practice Guide A practical guide covering sterility testing as a crucial part of pharmaceutical quality control for sterile products and medical devices. 🔗 https://www.youtube.com/watch?v=ZiVoUuB6hBU
- Sterility Testing of Pharmaceutical Products | Pharma Microbiology Testing Covers sterility testing performed in pharmaceutical industries for QC testing. 🔗 https://www.youtube.com/watch?v=eVWWO9hmJRM
- How to Perform a Sterility Test? (Rocker Discover) Practical demonstration on preventing microbial contamination in pharmaceuticals. 🔗 https://www.youtube.com/watch?v=uVlfrIJ4KrY
- Pharmaceutical Microbiology | Sterility Testing — Membrane Filtration (AKTU Digital Education) Covers the membrane filtration method in detail. 🔗 https://www.youtube.com/watch?v=iVkCVjTNtlM
- Sterility Testing — Direct Inoculation Method Covers the direct inoculation method specifically. 🔗 https://www.youtube.com/watch?v=wOFslpDHPmU